How to Set Up Proton Mail 2026: Secure Account Checklist
Proton Mail setup guide for 2026: create an account, configure privacy and security settings, set up apps, Bridge, custom domains, and safer email habits.
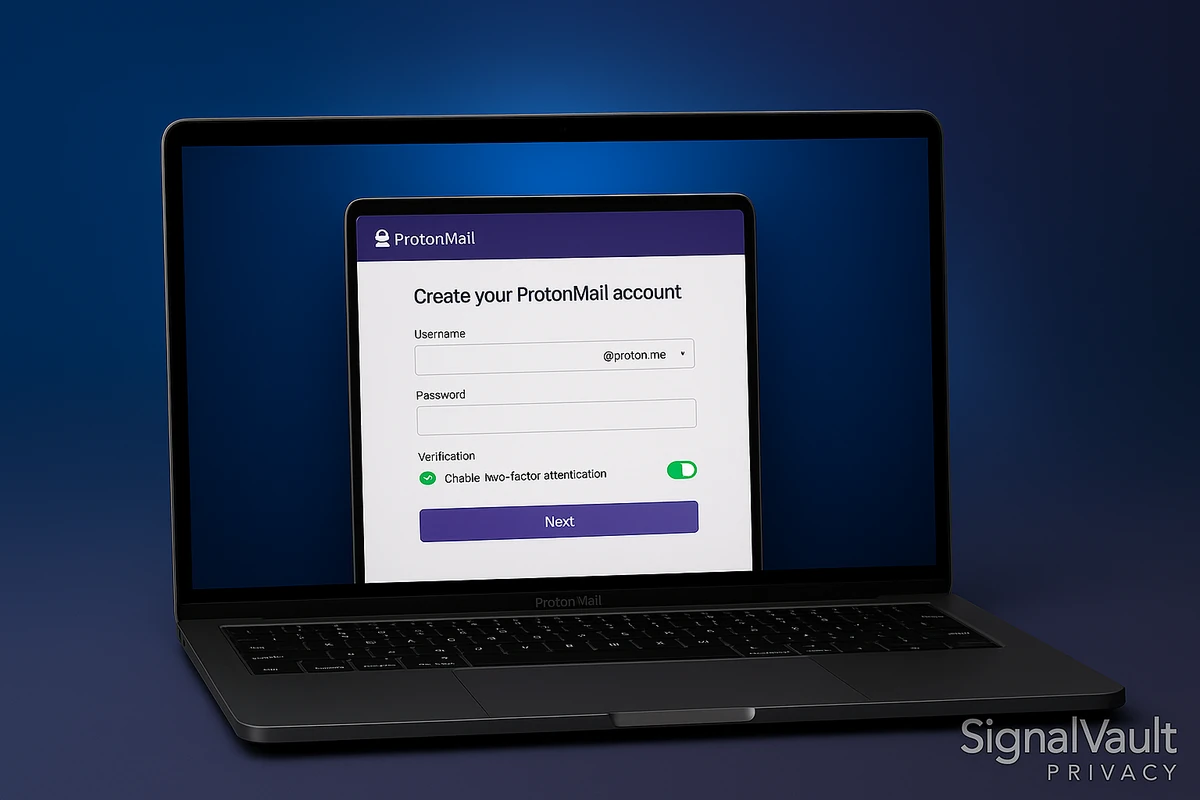
Proton Mail provides end-to-end encrypted email with zero-knowledge architecture and Swiss privacy protection. Setting up Proton Mail takes about 10 minutes and requires a few basic security choices to maximize privacy.
This guide walks you through creating your Proton Mail account, configuring security settings, setting up mobile apps, connecting desktop clients, and configuring custom domains. It also shows when Proton Mail is the right secure-email move, and when a workflow-first provider like Fastmail may be the cleaner switch.
Setup shortcut
Create the account first, then lock it down
Use Proton Mail if encrypted email is the main priority. If you need a smoother everyday Gmail or Outlook replacement, compare Fastmail before you move your primary inbox.
Quick Start: Proton Mail at a Glance
| Plan | What you get | When to choose it | Next step |
|---|---|---|---|
| Free | Basic private inbox | Testing Proton Mail before moving critical accounts | Start setup → |
| Paid Mail | More addresses, storage, Bridge, and custom-domain options | Use when Proton becomes your main inbox | Compare current plans → |
| Business | Team administration, custom domains, and organization controls | Use before changing company MX records | Review business setup path → |
Ready to get started? Get Proton Mail Now → Start with the free plan to test the service, or upgrade to Plus for custom domains and more storage.
Proton Mail Setup Checklist for 2026
Use this checklist before you move your main inbox. It keeps the setup practical and prevents the two mistakes that cause the most trouble: losing email during a domain migration and assuming every outside recipient will get automatic end-to-end encryption.
The shortest safe setup path
- 1. Open the Proton Mail account. Start with the address and recovery settings you are comfortable keeping long term.
- 2. Turn on two-factor authentication. Store backup codes in a password manager before you start moving sensitive accounts.
- 3. Decide whether this is a personal inbox or business inbox. If you need team addresses, custom domains, and multiple users, review the secure email for business guide before changing DNS.
- 4. Create every custom-domain user before changing MX records. This helps prevent lost mail when the domain starts routing to Proton Mail.
- 5. Add MX, SPF, DKIM, and DMARC records. These DNS records route mail to Proton and help your domain avoid spoofing and spam-folder problems.
- 6. Test with low-risk accounts first. Move newsletters and secondary logins before bank, health, legal, or business-critical accounts.
Why Set Up Proton Mail
Proton Mail offers end-to-end encryption by default. Emails sent between Proton Mail users are encrypted automatically. The service uses zero-knowledge architecture, meaning Proton cannot read your emails or access your encryption keys.
Swiss privacy laws are one reason many privacy-focused users choose Proton Mail. The service includes open-source apps, encryption-first account design, and independent security reviews.
Proton Mail provides a free tier for testing private email. Paid Mail and Business plans add more addresses, storage, custom domains, Bridge support, and team features. Check current plan details through Proton Mail before moving a business domain.
Ready to set up Proton Mail? Create your free Proton Mail account → Get started with end-to-end encrypted email in under 2 minutes.
Step 1: Create Your Proton Mail Account
Choose Your Plan
- Visit Proton Mail and click “Get Proton Mail”
- Select your plan:
- Free Plan: best for testing Proton Mail before moving important accounts
- Paid Mail plan: more storage, more addresses, custom domains, and Bridge support - Compare Proton Mail plans →
- Business plan: team administration, custom domains, and organization features
- Start with the free plan to test the service, or choose a paid plan for more features
Create Your Username
- Enter your desired username (this becomes your email address)
- Choose a username that reflects your identity or purpose
- Available usernames end with @protonmail.com or @proton.me
- Check availability and select your preferred domain
Set Your Password
- Create a strong, unique password
- Use a password manager to generate a secure password
- Store your password securely. You cannot reset it if lost
- ProtonMail uses your password to encrypt your mailbox locally
Verify Your Account
- Choose verification method:
- Email verification (recommended)
- SMS verification (alternative)
- Enter your verification code
- Complete the account creation process
- Log in to your new ProtonMail account
Account created? Great. Now secure it. Continue with the next steps, or compare Proton Mail paid plans if you need custom domains, Bridge, or more storage.
Step 2: Configure Security Settings
Enable Two-Factor Authentication
- Click your username in the top right corner
- Select “Settings” from the dropdown menu
- Click “Security” in the left sidebar
- Scroll to “Two-Factor Authentication”
- Click “Enable” next to “Two-Factor Authentication”
- Choose your 2FA method:
- TOTP Authenticator (recommended): Use apps like Authy or Google Authenticator
- Security Key: Use hardware keys like Yubikey
- Scan the QR code with your authenticator app
- Enter the verification code
- Save your recovery codes in a secure location
- Click “Enable” to activate two-factor authentication
Two-factor authentication adds an extra layer of security. Even if someone obtains your password, they need your second factor to access your account. Store recovery codes in a password manager or secure location.
Configure Password Recovery
- In Security settings, scroll to “Password Recovery”
- Enable password recovery if desired
- Set up recovery email (optional)
- Store recovery information securely
- Review recovery options regularly
Password recovery allows you to reset your account password if forgotten. However, enabling password recovery reduces security because ProtonMail can reset your encryption keys. Consider disabling password recovery for maximum security if you use a password manager.
Set Up Login Notifications
- In Security settings, scroll to “Login Notifications”
- Enable email notifications for new logins
- Enable push notifications for mobile apps
- Review login history regularly
- Monitor for suspicious activity
Login notifications alert you when someone accesses your account from a new device or location. Review login history weekly to detect unauthorized access attempts.
Step 3: Configure Email Settings
Set Up Your Display Name
- Click “Settings” in the top right corner
- Select “Identity” from the left sidebar
- Click “Add New Identity”
- Enter your display name
- Set your email address
- Choose your signature (optional)
- Save your identity settings
Your display name appears in emails you send. Use your real name or a professional alias depending on your use case. Configure multiple identities for different purposes if needed.
Configure Email Encryption
- In Settings, click “Encryption” in the left sidebar
- Review encryption settings:
- Automatic Encryption: Enabled by default for ProtonMail users
- Password-Protected Emails: Available for non-ProtonMail recipients
- Expiration Times: Set automatic expiration for sensitive emails
- Enable password-protected emails for external recipients
- Set default expiration times if desired
- Save your encryption settings
ProtonMail automatically encrypts emails sent to other ProtonMail users. For non-ProtonMail recipients, you send password-protected emails. The recipient receives a link to decrypt the message with a password you provide separately.
Set Up Email Filters
- In Settings, click “Filters” in the left sidebar
- Click “Add New Filter”
- Configure filter rules:
- Condition: Sender, subject, recipient, or keyword
- Action: Move to folder, mark as read, delete, or forward
- Name your filter
- Save your filter settings
Email filters help organize your inbox automatically. Create filters for newsletters, work emails, or personal messages. Filters run automatically when new emails arrive.
Step 4: Set Up Mobile Apps
Install ProtonMail iOS App
- Open the App Store on your iPhone or iPad
- Search for “ProtonMail”
- Download and install the ProtonMail app
- Open the app and log in with your ProtonMail credentials
- Enter your two-factor authentication code if enabled
- Grant necessary permissions:
- Notifications: For new email alerts
- Face ID / Touch ID: For biometric authentication
- Contacts: To sync your address book
- Configure notification settings
- Set up biometric authentication
The ProtonMail iOS app provides full encryption support and syncs with your web account. Enable biometric authentication for quick access while maintaining security.
Install ProtonMail Android App
- Open Google Play Store on your Android device
- Search for “ProtonMail”
- Download and install the ProtonMail app
- Open the app and log in with your ProtonMail credentials
- Enter your two-factor authentication code if enabled
- Grant necessary permissions:
- Notifications: For new email alerts
- Fingerprint: For biometric authentication
- Contacts: To sync your address book
- Configure notification settings
- Set up fingerprint authentication
The ProtonMail Android app offers the same encryption features as the iOS app. Enable fingerprint authentication for secure, quick access to your emails.
Configure Mobile App Settings
- Open the ProtonMail mobile app
- Tap the menu icon (three horizontal lines)
- Select “Settings”
- Configure app settings:
- Notifications: Enable push notifications for new emails
- Auto-Lock: Set automatic lock timer
- Biometric Authentication: Enable Face ID, Touch ID, or fingerprint
- Sync: Configure email sync frequency
- Storage: Manage cached data
- Review privacy settings
- Test notifications and authentication
Mobile app settings control how ProtonMail behaves on your device. Enable auto-lock and biometric authentication for maximum security. Configure sync frequency to balance battery life and real-time updates.
Step 5: Set Up ProtonMail Bridge (Desktop Client)
Download ProtonMail Bridge
- Visit ProtonMail.com and log in to your account
- Click “Settings” in the top right corner
- Select “All Settings” from the dropdown
- Click “ProtonMail Bridge” in the left sidebar
- Download ProtonMail Bridge for your operating system:
- Windows: Download Windows installer
- macOS: Download macOS installer
- Linux: Download Linux installer or use package manager
- Install ProtonMail Bridge on your computer
- Launch ProtonMail Bridge
ProtonMail Bridge allows you to use ProtonMail with desktop email clients like Outlook, Apple Mail, or Thunderbird. Bridge runs locally on your computer and encrypts emails before sending them to ProtonMail servers.
Note: Proton Mail Bridge is a paid-plan feature. Compare Proton Mail plans → if you want to use Proton Mail with Outlook, Apple Mail, or Thunderbird.
Configure ProtonMail Bridge
- Open ProtonMail Bridge
- Log in with your ProtonMail credentials
- Enter your two-factor authentication code if enabled
- Configure Bridge settings:
- Autostart: Enable to start Bridge automatically
- Tray Icon: Enable to show Bridge in system tray
- Notifications: Enable for connection status alerts
- Generate app-specific password if needed
- Note your IMAP and SMTP settings:
- IMAP Server: 127.0.0.1
- IMAP Port: 1143
- SMTP Server: 127.0.0.1
- SMTP Port: 1025
- Username: Your ProtonMail email address
- Password: Your Bridge password (different from account password)
ProtonMail Bridge creates a local mail server on your computer. Your email client connects to Bridge, which encrypts and decrypts emails before sending them to ProtonMail servers. This allows you to use any email client while maintaining end-to-end encryption.
Configure Your Email Client
- Open your email client (Outlook, Apple Mail, Thunderbird)
- Add a new email account
- Enter your email address and password
- Choose “IMAP” as account type
- Enter Bridge server settings:
- Incoming Server: 127.0.0.1
- Incoming Port: 1143
- Outgoing Server: 127.0.0.1
- Outgoing Port: 1025
- Enable SSL/TLS encryption
- Test your connection
- Sync your emails
Your email client connects to ProtonMail Bridge instead of ProtonMail servers directly. Bridge handles encryption and decryption transparently, so you use your email client normally while maintaining encryption.
Step 6: Set Up Custom Domains (Paid Plans)
Add Your Custom Domain
- Log in to your Proton Mail account
- Click “Settings” in the top right corner
- Select “All Settings” from the dropdown
- Click “Domain Names” in the left sidebar
- Click “Add New Domain”
- Enter your domain name
- Verify domain ownership:
- DNS Verification: Add TXT record to your domain’s DNS
- Email Verification: Send verification email to domain administrator
- Complete domain verification
- Configure domain settings
Custom domains allow you to use your own domain name with Proton Mail. Use a paid plan for custom domains, then configure DNS records to route email through Proton Mail servers.
Need a custom domain? Compare Proton Mail plans → to use your own domain name while keeping the Proton Mail privacy model.
Configure DNS Records
- Create every needed mailbox and alias in Proton Mail first.
- Log in to your domain registrar or DNS provider.
- Add the MX records shown inside Proton Mail’s domain settings and remove conflicting old MX records.
- Add the SPF record Proton provides for your domain.
- Add the DKIM record Proton provides for your domain.
- Add a DMARC record so receivers know how to treat spoofed mail.
- Verify the records inside Proton Mail and wait for DNS propagation.
DNS records tell other email servers how to route emails for your domain. MX records point mail to Proton Mail. SPF, DKIM, and DMARC records help verify email authenticity and reduce spoofing. If your team needs a broader decision path before moving DNS, compare secure email for business and Proton Mail alternatives.
Create Email Addresses
- In Domain Names settings, click your domain
- Click “Add New Address”
- Enter your desired email address
- Set password and display name
- Configure email settings
- Save your new email address
Create multiple email addresses for different purposes. Use aliases for newsletters, work emails, or personal messages. Each address uses your domain name and maintains full encryption.
Step 7: Import Contacts and Emails
Import Contacts
- Click “Contacts” in the top navigation
- Click “Import” button
- Choose import method:
- CSV File: Upload contacts from CSV file
- vCard File: Upload contacts from vCard file
- Google Contacts: Import from Google account
- Select your contacts file
- Map contact fields
- Review imported contacts
- Save your contacts
Import contacts from your previous email provider or contact manager. ProtonMail supports CSV and vCard formats. Contacts are encrypted and stored securely in your ProtonMail account.
Forward Emails from Old Account
- Log in to your old email account
- Configure email forwarding:
- Gmail: Settings > Forwarding and POP/IMAP > Add forwarding address
- Outlook: Settings > Mail > Forwarding > Enable forwarding
- Other providers: Check provider documentation
- Enter your ProtonMail email address
- Verify forwarding address
- Enable forwarding
- Test forwarding by sending a test email
Email forwarding automatically sends emails from your old account to ProtonMail. This allows you to receive emails at your old address while using ProtonMail for encryption. Update your email address with contacts and services gradually.
Migrate Emails (Advanced)
- Use ProtonMail Bridge to connect your old email client
- Export emails from your old account to local storage
- Import emails into ProtonMail Bridge
- Sync emails with ProtonMail servers
- Verify email migration
- Archive old emails if needed
Email migration moves existing emails to ProtonMail. This process encrypts old emails and stores them securely. Migration works best with ProtonMail Bridge and email clients that support IMAP.
Step 8: Configure Advanced Settings
Set Up Email Aliases
- In Settings, click “Addresses” in the left sidebar
- Click “Add New Address”
- Choose address type:
- Regular Address: Full email address
- Alias: Alternative address that forwards to main address
- Enter your alias name
- Configure alias settings
- Save your alias
Email aliases allow you to use multiple email addresses that forward to your main account. Use aliases for different purposes like newsletters, shopping, or work. Aliases help organize incoming emails and protect your main address.
Configure Auto-Reply
- In Settings, click “Auto-Reply” in the left sidebar
- Enable auto-reply
- Set auto-reply message
- Configure auto-reply schedule:
- Always: Reply to all incoming emails
- Scheduled: Reply only during specified times
- Set start and end dates
- Save your auto-reply settings
Auto-reply sends automatic responses to incoming emails. Use auto-reply for vacation messages, out-of-office notifications, or general information. Configure schedules to send replies only during specific times.
Set Up Email Folders
- In your inbox, click “Folders” in the left sidebar
- Click “Add Folder”
- Enter folder name
- Choose folder color
- Set folder location
- Save your folder
- Create subfolders if needed
Email folders help organize your inbox. Create folders for different categories like work, personal, or newsletters. Use subfolders for further organization. Folders are encrypted and stored securely.
Step 9: Security Best Practices
Use Strong Passwords
- Use a password manager to generate strong passwords
- Create unique passwords for each account
- Use long passwords (16+ characters)
- Include uppercase, lowercase, numbers, and symbols
- Store passwords securely in a password manager
- Never share passwords with anyone
Strong passwords protect your account from unauthorized access. ProtonMail passwords cannot be reset, so store them securely. Use a password manager like 1Password or Bitwarden to manage passwords.
Enable Two-Factor Authentication
- Enable two-factor authentication in Security settings
- Use TOTP authenticator apps (Authy, Google Authenticator)
- Store recovery codes securely
- Test two-factor authentication regularly
- Update recovery codes if needed
Two-factor authentication adds an extra layer of security. Even if someone obtains your password, they need your second factor to access your account. Enable 2FA on all accounts that support it.
Regularly Review Security Settings
- Review Security settings monthly
- Check login history for suspicious activity
- Update passwords if compromised
- Review active sessions
- Revoke access for unused devices
- Update recovery information if needed
Regular security reviews help detect and prevent unauthorized access. Monitor login history for unfamiliar devices or locations. Revoke access for devices you no longer use.
Encrypt Sensitive Emails
- Use password-protected emails for external recipients
- Set expiration times for sensitive messages
- Verify recipient addresses before sending
- Use secure subject lines
- Avoid sending sensitive information in subject lines
Encrypt sensitive emails to protect confidential information. Password-protected emails require recipients to enter a password to decrypt messages. Set expiration times to automatically delete sensitive emails after a specified period.
Step 10: Troubleshooting Common Issues
Cannot Log In
- Verify your email address and password
- Check two-factor authentication code
- Clear browser cache and cookies
- Try logging in from a different browser
- Check internet connection
- Contact ProtonMail support if issues persist
Login issues often result from incorrect credentials or two-factor authentication problems. Verify your password and 2FA code. Clear browser cache if login pages don’t load correctly.
Emails Not Sending
- Check your internet connection
- Verify recipient email address
- Check daily sending limits (150 emails on free plan)
- Review email content for spam triggers
- Check ProtonMail status page for outages
- Contact ProtonMail support if issues persist
Email sending issues can result from network problems, sending limits, or spam filters. Check your daily sending limit on the free plan. Verify recipient addresses are correct.
Mobile App Not Syncing
- Check your internet connection
- Verify app permissions
- Restart the mobile app
- Update the app to the latest version
- Clear app cache and data
- Reinstall the app if needed
Mobile app sync issues often result from network problems or app permissions. Verify internet connectivity and app permissions. Update the app to the latest version for bug fixes.
Bridge Connection Issues
- Verify ProtonMail Bridge is running
- Check Bridge server settings (127.0.0.1)
- Verify port numbers (1143 for IMAP, 1025 for SMTP)
- Check firewall settings
- Restart ProtonMail Bridge
- Reconfigure email client settings
Bridge connection issues can result from incorrect settings or firewall blocks. Verify Bridge is running and ports are accessible. Check firewall settings to allow Bridge connections.
Frequently Asked Questions
How long does Proton Mail setup take?
Proton Mail setup takes about 10 minutes for basic configuration. Creating an account, turning on two-factor authentication, and installing mobile apps are quick. Custom domains and Bridge setup take longer because they involve DNS records or desktop-client configuration.
Do I need a paid plan to use Proton Mail?
No. Proton Mail offers a free plan for basic encrypted email. You will usually need a paid Mail or Business plan for custom domains, additional addresses, more storage, Bridge, and team administration.
Can I use Proton Mail with my existing email client?
Yes, Proton Mail Bridge lets eligible paid accounts use Proton Mail with desktop email clients like Outlook, Apple Mail, or Thunderbird. Bridge runs locally and handles encrypted mailbox access for the desktop client.
Is Proton Mail secure?
Yes. Proton Mail uses end-to-end encryption for messages between Proton users and a zero-access mailbox design. That makes it a stronger privacy choice than conventional inboxes for sensitive email.
Can I use custom domains with Proton Mail?
Yes, custom domains are available on eligible paid plans. Create your users and addresses first, then verify domain ownership and configure Proton’s MX, SPF, DKIM, and DMARC records.
How do I migrate from Gmail to Proton Mail?
- Create a Proton Mail account
- Forward emails from Gmail to Proton Mail
- Import contacts from Gmail
- Update your email address with contacts and services
- Use Proton Mail Bridge to migrate existing emails if needed
- Gradually transition to Proton Mail
Migration from Gmail involves forwarding emails, importing contacts, and updating your email address. Use email forwarding to receive emails at your old address while using ProtonMail. Update your email address gradually with contacts and services.
Does Proton Mail work on mobile devices?
Yes, Proton Mail offers mobile apps for iOS and Android. The mobile apps sync with your web account and support the core Proton Mail encrypted-email workflow.
What happens if I forget my Proton Mail password?
If you forget your Proton Mail password, account recovery depends on the recovery options you configured. Store your password and recovery codes in a password manager before moving critical accounts.
Conclusion
Proton Mail setup is straightforward and takes about 10 minutes for basic configuration. Follow these steps to create your account, configure security settings, set up mobile apps, connect desktop clients, and configure custom domains.
Proton Mail provides encrypted email with Swiss privacy positioning, a free testing path, and paid plans for custom domains, Bridge, and business use.
Enable two-factor authentication, use strong passwords, and regularly review security settings to maximize protection. Configure mobile apps and desktop clients carefully before you move important accounts.
Ready to secure your email communication? Get Proton Mail today → Start with the free plan to test the service, or choose a paid plan for custom domains, Proton Mail Bridge, and more storage. Experience truly private email with end-to-end encryption and Swiss privacy protection.
For more information, see our complete Proton Mail review for detailed feature analysis. Looking for alternatives? Compare Fastmail vs Proton Mail, Proton Mail alternatives, and Outlook email encryption options.